F5 Distributed Cloud Source | Edit on
Deploy F5 Distributed Cloud Customer Edge on ProxMox
This guide was written based on Proxmox VE 8.1.3.
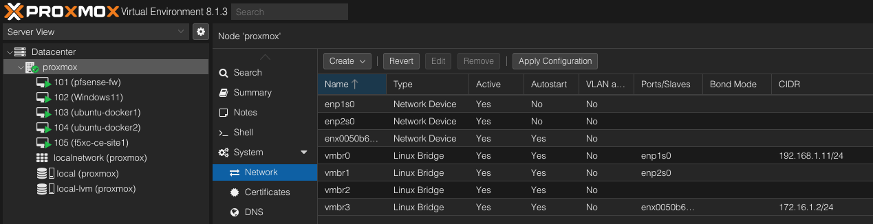
Under your node (proxmox) in the Network section
Ensure there is a bridge connected to the network(s) you want to use
vmbr0 will be used in this example
vmbr0 on this setup is the outside interface with access to the internet
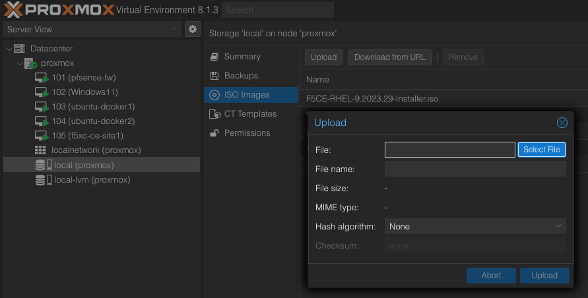
Upload the ISO to your proxmox installation
local->ISO Images->Upload
Select the ISO file and finalize with Upload
Once upload completes you should see it within the ISO Images list
Click Create VM in the top right of the proxmox gui
Enter a unused VM ID >100
Enter a name for the VM
Click Next to move to the OS tab
Select the storage location
Leave Guest OS set to Linux and 2.6 Kernel
Select the CE ISO image that was uploaded
Click Next to move to the System tab
No changes are needed
Click Next to move to the Disks tab
Set Disk Size to >45GB (80GB+ for regular operations, 100GB+ recommended for AppStack)
Ensure Cache is set to No Cache
Click Next to move to the CPU tab
CPU Cores should be set to >4
Type should be set to host (host virtualization is required vs QEMU emulation types)
Click Next to move to the Memory tab
Set Memory to >14GB (16GB is recommended)
Warning
Less than 14Gb will result in an error registering the CE later in the process
Click Next to move to the Network tab
Set Bridge to the network bridge device for the outside interface eg. vmbr0
Set Model to VirtIO
Firewall can be disable otherwise proxmox rules could prevent communication to the VM
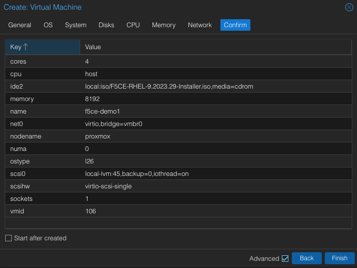
Click Next to move to the Confirm tab
Review choices and click Finish to create the VM
Note
If an addition interface (INSIDE) is need it can be added now.
Select the CE VM choose Console and click Start. From here you can follow the baremetal installation instructions.